How to Set Up Online Booking
Configure Online Bookings Setup for your booking and business management platform: branding and URL, timing rules, pre-payments with Stripe, announcements and terms, online portal permissions, and analytics.
Online booking lets clients book appointments any time of day from their phone or computer. Once configured, you share a booking link (or QR code) on your website, social media, and printed materials. The system respects your opening hours, staff roster, breaks, and which services or employees can be booked online, so you stay in control.
This guide walks through every section on the Online Bookings Setup page and what to set for a typical salon, spa, or service business.
Before You Start
Make sure the basics of your business are already in place:
- Opening hours and staff schedules (rosters) are set
- Services you want offered online are enabled for online booking
- Employees who can be booked online are marked accordingly
- At least one site / location is configured
Open Online Bookings Setup
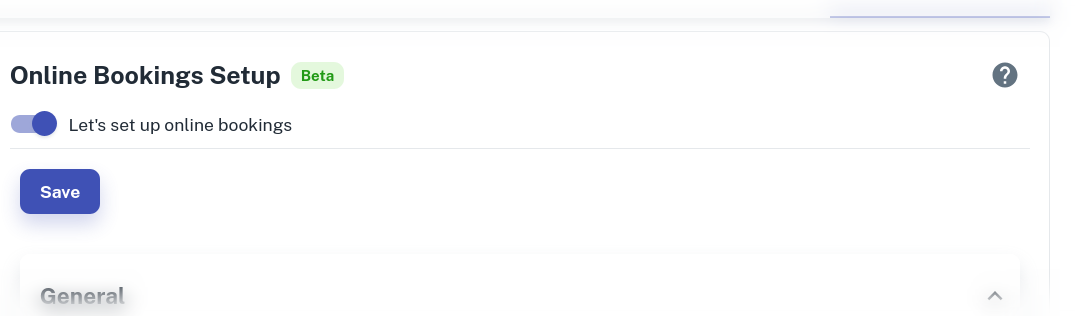
- Go to My Account
- Open the Add-ons tab
- In the left menu, expand Online Bookings
- Select Online Bookings Setup
- Turn on Let’s setup online bookings
- Click Save at the top of the page
Your booking page is now live. Use the sections below to brand it, control timing, collect deposits, and decide what clients can manage themselves.
General
The General section defines how your booking page looks and how clients reach it.
Online Booking URL
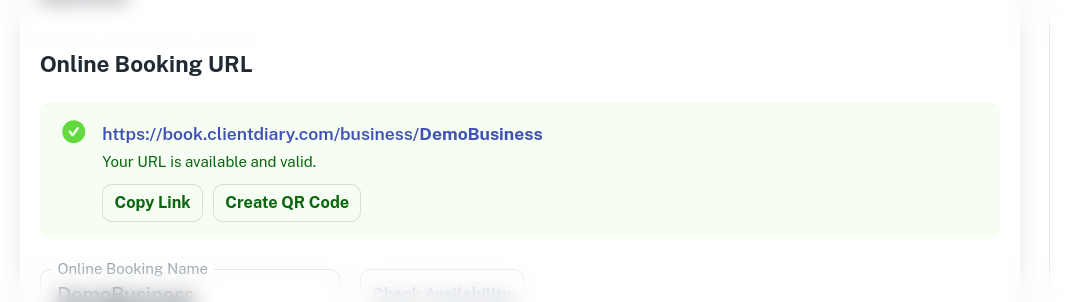
This is the live link clients use to book (for example https://book.clientdiary.com/business/your-business-name).
- Copy Link. Copy the URL to paste into your website, Facebook, Instagram, Google Business Profile, or email signature
- Create QR Code. Generate a QR code for posters, reception counters, business cards, or appointment cards
Tip: Put the booking link behind a clear “Book Now” button on your website homepage and contact page.
Online Booking Name

This is the custom slug at the end of your booking URL. Choose something short and recognisable (often your business or brand name).
- Enter the name you want
- Click Check Availability
- If it is free, click Save
Changing this name updates your public booking URL, so update any existing website links or QR codes afterwards.
Business Gallery for Online Booking
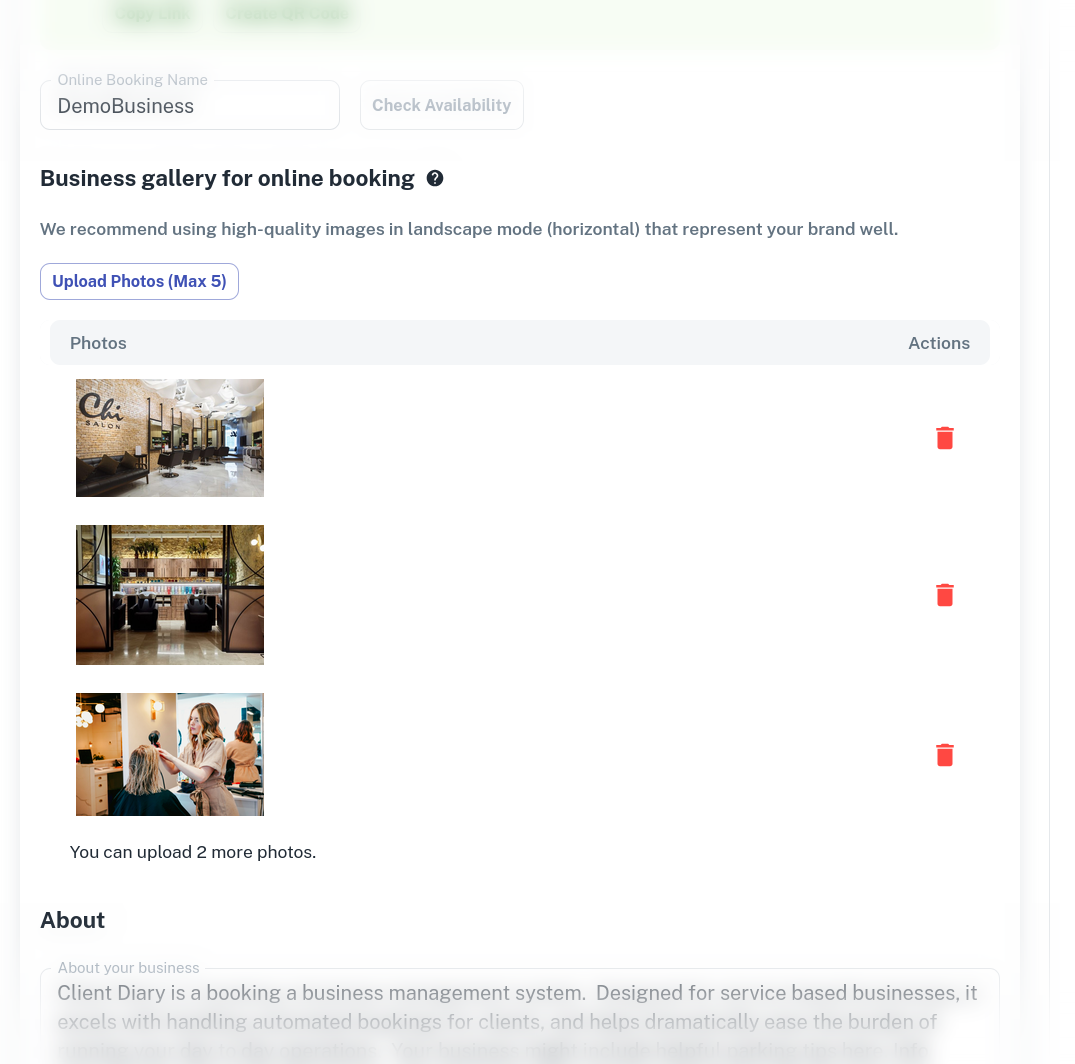
Upload up to 5 photos that appear on your booking page. Landscape images work best, such as venue shots, team photos, or product/service imagery that reflects your brand.
- Click Upload Photo (Max 5)
- Select high-quality landscape images
- Click Save
If you have multiple sites / locations, you can also add location-specific galleries under Sites / Locations → edit a location → Location gallery for online booking.
About
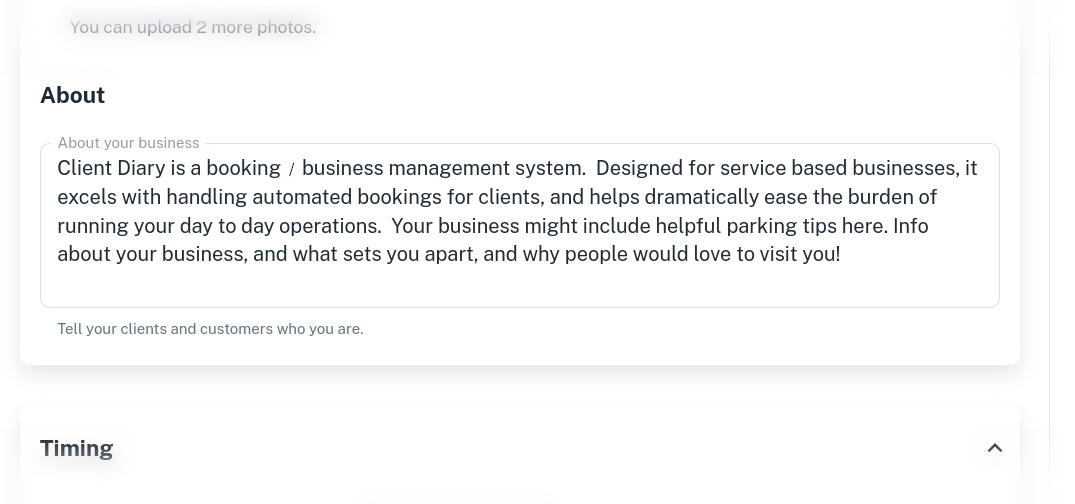
Write a short introduction clients see on your booking page. Include what you offer, your style or specialties, parking or access notes, and anything that helps a new client feel confident booking.
Keep it friendly and concise. A few paragraphs is usually enough.
Timing
The Timing section controls when clients can book and how appointment start times are offered.
After Hours Booking

Sets how much lead time is required when someone books outside your normal opening hours (for example 30 minutes). This prevents last-minute bookings overnight that you cannot reasonably fulfil when you open.
Only Allow Bookings on the Hour and Half Hour

When set to Yes, clients can only choose start times like 9:00 or 9:30, not every interval. Useful if you prefer a simpler diary. Leave as No if you want the full range of slots from the interval setting below.
Time Slot Interval

Controls how often start times appear (for example every 15 minutes). Common options are 5, 10, 15, or 30 minutes.
- Shorter intervals give clients more choice
- Longer intervals keep the diary cleaner and easier to manage
Number of Days / Hours Bookings Must Be Made Prior


These fields set a minimum notice period before an appointment.
- Days. For example
1means clients cannot book for same-day appointments - Hours. For example
2means they must book at least two hours ahead
Use both together if needed (for example 0 days and 2 hours). Setting both to 0 allows bookings up until the slot starts (subject to after-hours rules and availability).
Number of Days Bookings Can Be Made into the Future
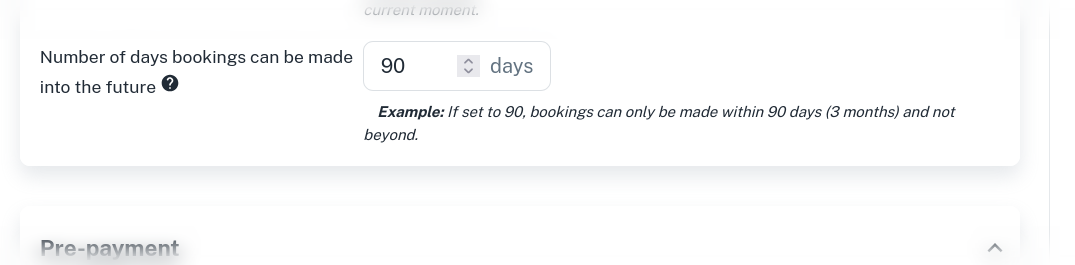
Limits how far ahead clients can schedule (for example 90 days). This keeps your diary manageable and avoids bookings months ahead when staff or services may change.
Suggested starting point for most businesses:
| Setting | Typical value |
|---|---|
| After hours booking | 0 minutes |
| Bookings on hour / half hour only | No |
| Time slot interval | 15 minutes |
| Minimum notice | 0 days / 0–2 hours |
| How far ahead | 60–90 days |
Pre-Payment
Pre-payments (deposits) reduce no-shows and improve cash flow. Clients pay part or all of the booking online; the amount is credited to their account and applied when they visit.
Turn Pre-Payment On

- Expand Pre-payment
- Set Pre-payment to Yes
- Connect a payment account if prompted (see Stripe below)
- Choose your amount rules
- Click Save
Connect with Stripe
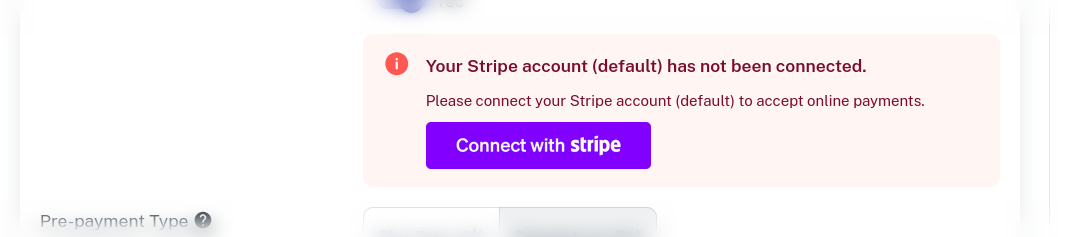
Online card payments require a connected Stripe account.
- Click Connect with Stripe
- Log in to an existing Stripe account, or create one
- You will be returned to Online Bookings Setup with Stripe connected
Until Stripe is connected, pre-payment options that need card payment will not work for clients.
Pre-Payment Type and Value

Choose how much to collect at booking time:
- Flat Amount. A fixed dollar deposit (for example $20)
- Percentage. A percentage of the booking total (for example 50%)
Enter the value in Pre-payment value, then Save.
Example: A client books $100 of services with a 50% pre-payment. They pay $50 online, receive a $50 credit on their account, and pay the remaining $50 at the point of sale on the day.
Conditional Pre-Payment
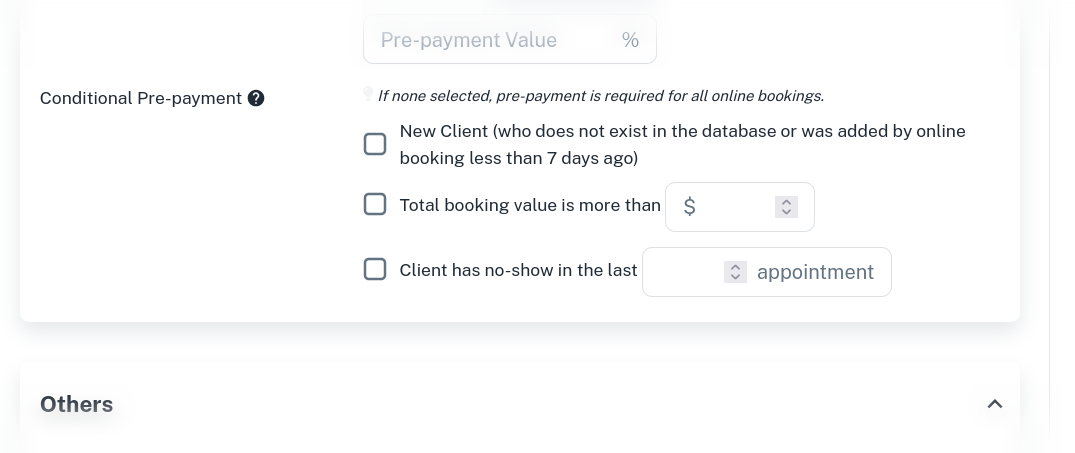
Use conditions so only certain bookings require a deposit (leave conditions unticked to require pre-payment for everyone when pre-payment is on):
- New Client. Clients not already in your database
- Total booking value is more than. Only when the booking total reaches your threshold
- Client has no-shows in the last X appointments. Only clients with recent no-shows
You can combine conditions. For example: require a deposit if the client is new or the booking is over $100 or they have a no-show in their last 3 appointments.
Others
Miscellaneous controls for messaging, approval, diary packing, and client communication.
Announcement
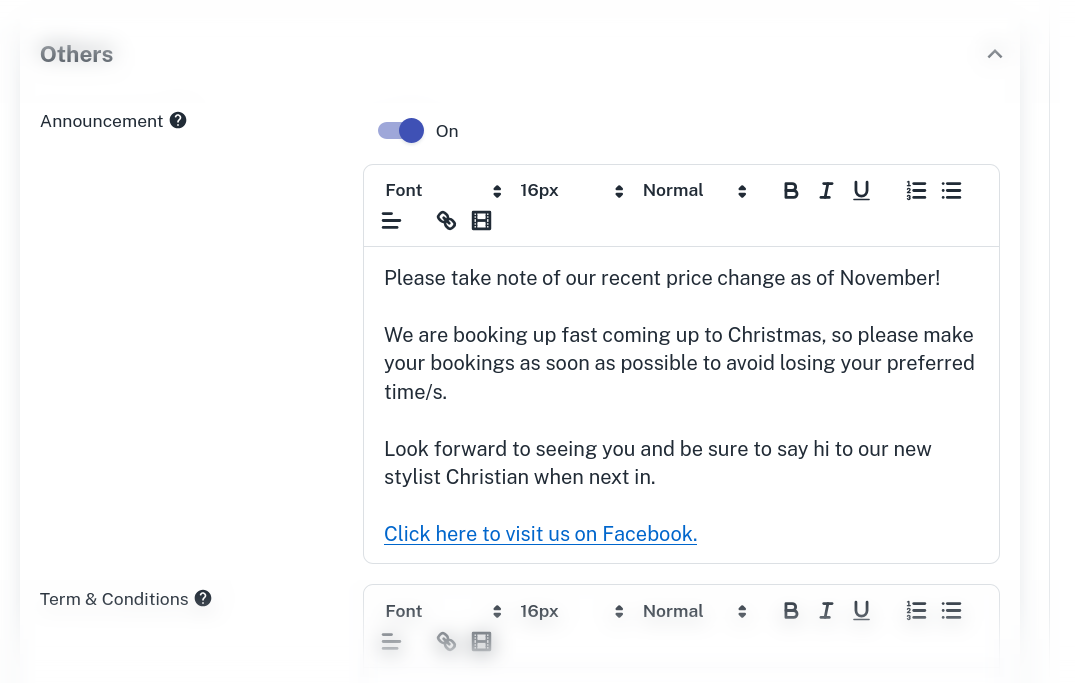
Turn Announcement on to show a temporary banner or message on your booking page (holiday hours, promotions, temporary closures). Turn it off when the message is no longer needed.
Terms & Conditions
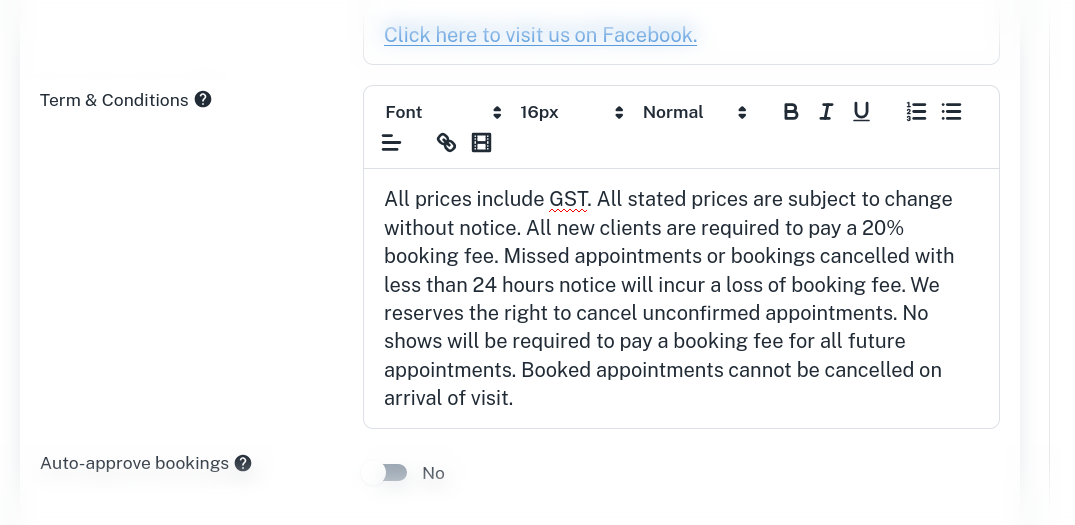
Enter the terms clients agree to when booking. Cover cancellation policy, late arrival, deposits, and any house rules. Use the rich-text editor for headings, lists, and emphasis so the text is easy to read.
Auto-Approve Bookings

- No (default). New online bookings wait for you to approve or deny them
- Yes. Bookings are confirmed automatically when they meet your rules
Auto-approve saves time once you trust your online setup; keep it off while you are still testing.
Get Email Notification When New Booking Is Made

When Yes, your business receives an email each time a client submits an online booking. Recommended while you are learning the workflow, and useful even with auto-approve so you stay informed.
Reduce Gaps Between Bookings

When enabled, the system prefers start times that keep appointments clustered rather than leaving awkward gaps in the diary. Turn on if you want a tighter schedule; leave off if you prefer more breathing room between clients. Note: Turning this on reduces the amount of available slots a client can see. This might reduce booking rates.
Show Service Prices

When Yes, clients see service prices on the booking page. Turn off only if you prefer not to display prices online (for example quote-based services).
All Services in the Booking Are Assigned to One Employee

When Yes, every service in a multi-service booking is assigned to the same staff member. When No, different services can be assigned to different employees where skills and availability allow.
Allow Waitlist for Online Bookings

When Yes, clients can join a waitlist if their preferred time is unavailable. Helpful for busy periods and popular staff.
SMS Your Clients Will Receive
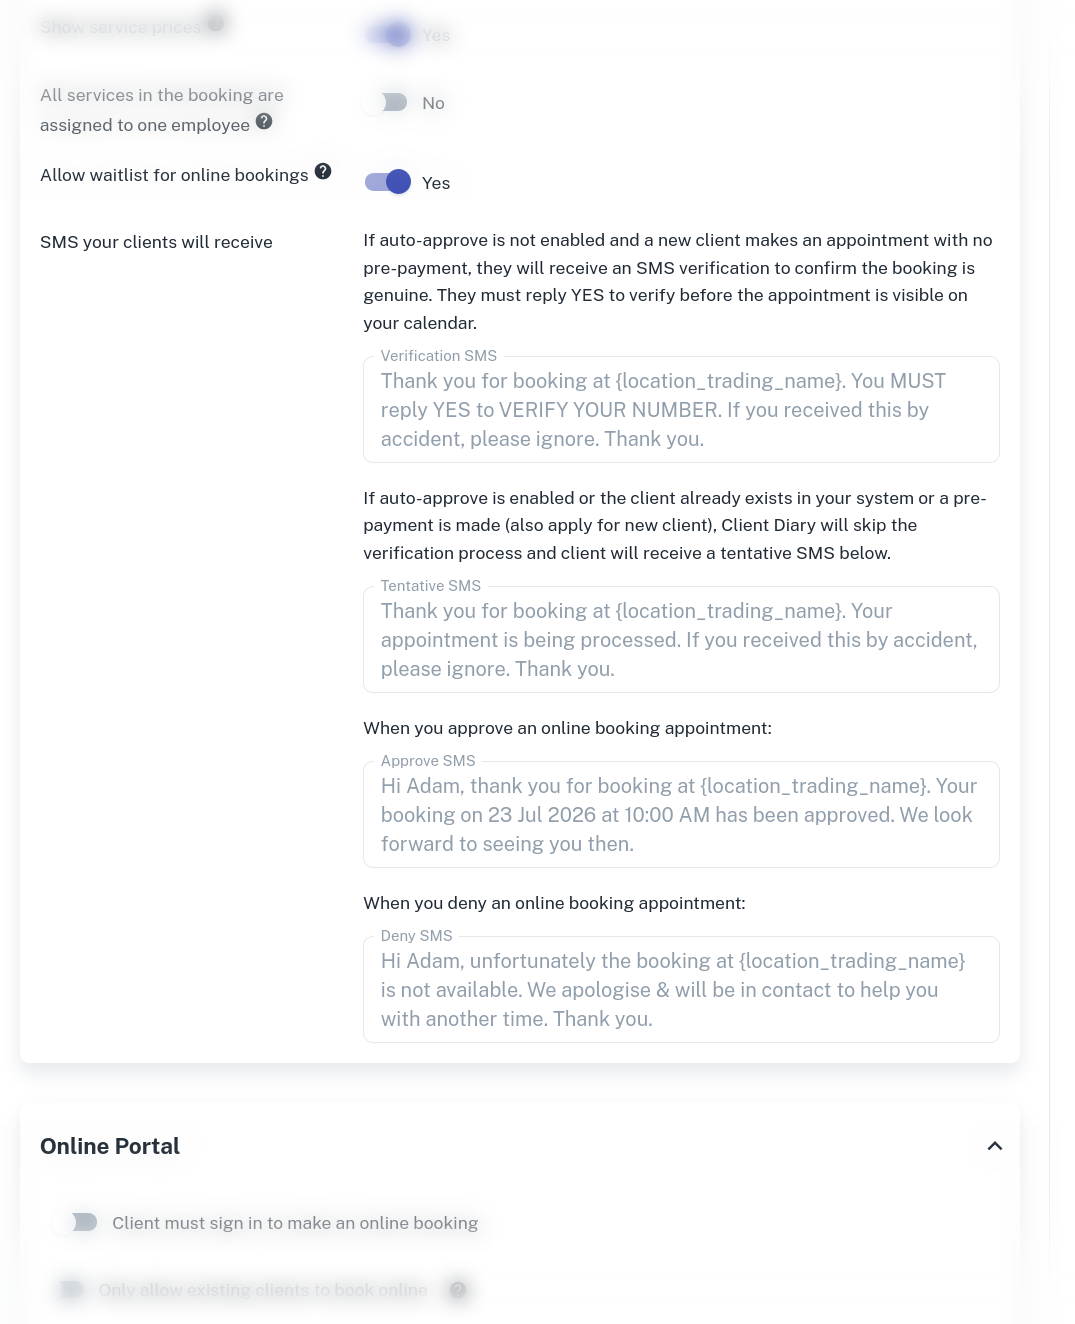
Online booking sends automated SMS messages through the booking lifecycle. Typical messages include:
- Verification. Confirms the client’s mobile number
- Processing. Acknowledges the booking request while it is pending
- Confirmation. Confirms the appointment once approved
- Denial. Notifies the client if the booking is declined
You do not need to write these from scratch; the platform uses standard templates. Ensure your business contact details and SMS reminder name are correct so messages look professional.
Online Portal
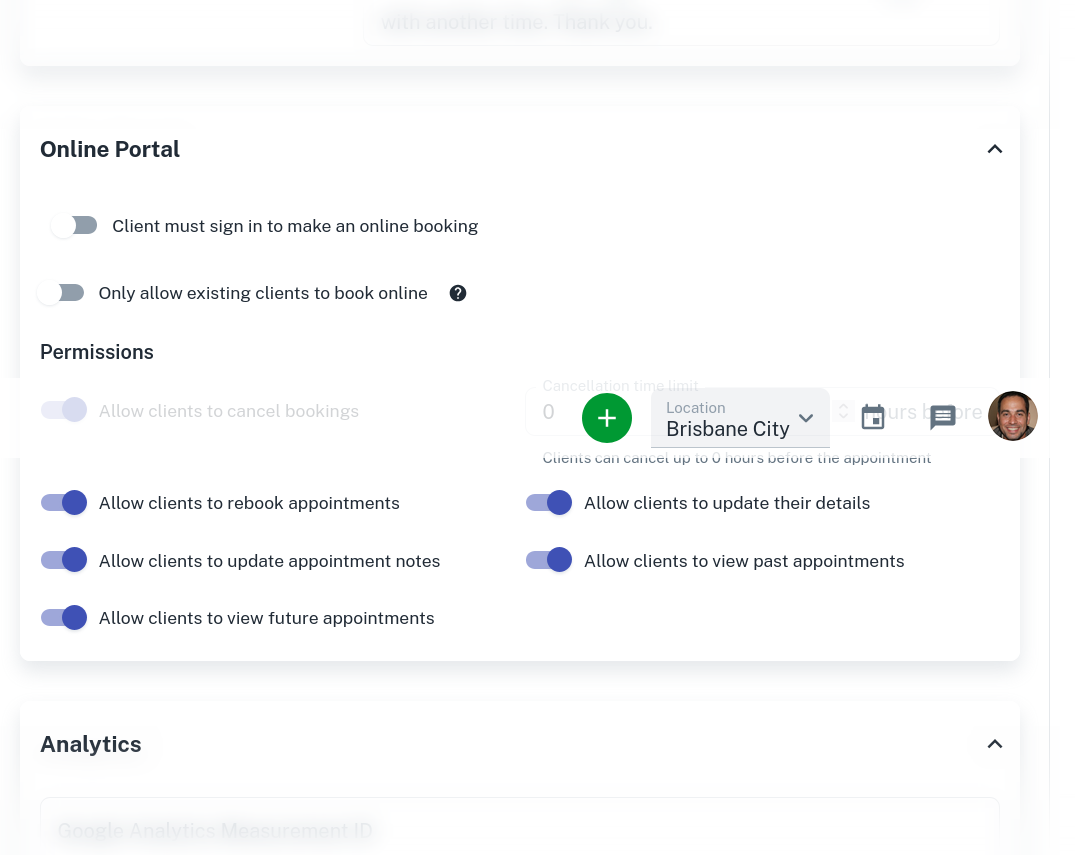
The Online Portal section controls whether clients must sign in and what they can manage themselves after booking.
Access Rules
- Client must login to make an online booking. Forces sign-in or account creation before completing a booking. Useful for repeat client recognition and self-service later.
- Only allow existing clients to book online. Restricts online booking to clients already in your database (new walk-in prospects cannot book online).
Leave both No if you want the simplest public booking experience for new and returning clients.
Client Permissions
Toggle each permission on or off:
| Permission | What it does |
|---|---|
| Allow clients to cancel bookings | Clients can cancel online, optionally limited to within a set number of hours before the appointment |
| Allow clients to rebook appointments | Clients can book a follow-up from an existing appointment |
| Allow clients to update appointment notes | Clients can edit notes attached to their booking |
| Allow clients to view future appointments | Clients can see upcoming bookings in their portal |
| Allow clients to update their details | Clients can keep phone, email, and profile details current |
| Allow clients to view past appointments | Clients can review booking history |
Cancel within X hours: if cancellation is allowed, set how close to the appointment a client may still cancel online (for example 24 hours). Closer cancellations may need to go through your reception team and your terms & conditions.
Click Save after changing any portal options.
Analytics
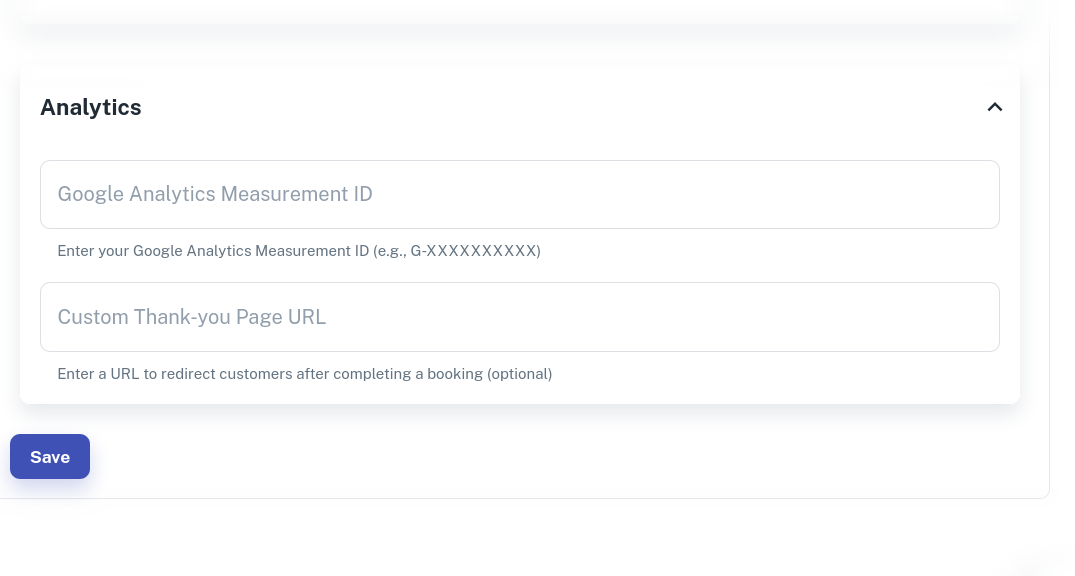
Google Analytics Measurement ID
Paste your Google Analytics Measurement ID (for example a G- ID) to track visits and conversions on your booking page. Leave blank if you do not use Google Analytics.
Custom Thank-You Page URL
After a successful booking, clients can be redirected to a page you control, such as your website thank-you page, a review request page, or a promotion landing page. Enter the full URL and Save.
Recommended Setup Checklist
Use this as a quick path from “turned on” to “ready to share”:
- Turn on Let’s setup online bookings and Save
- Set a memorable Online Booking Name and confirm availability
- Upload gallery photos and write your About text
- Set timing: interval, minimum notice, and how far ahead clients can book
- Decide on pre-payments; connect Stripe if collecting deposits
- Add Terms & Conditions and optional announcement
- Choose auto-approve vs manual approval, and email notifications
- Configure Online Portal permissions to match your cancellation policy
- Optionally add Analytics and a thank-you page URL
- Copy your booking link (or create a QR code) and add it to your website and social profiles
- Make a test booking on a phone and a desktop to confirm the full flow. See how your client uses online booking
Always click Save after changing settings. There is a Save button at both the top and bottom of the page.
Related Setup Outside This Screen
Online booking also depends on settings elsewhere in the system:
- Which services can be booked online
- Which employees appear online and what skills they have
- Opening hours and staff roster / breaks
- Location-specific photos or disabling online booking per site
Once those are aligned with the options on Online Bookings Setup, clients can book confidently, and you keep the diary running the way your business needs.
What did you like?
What went wrong?